
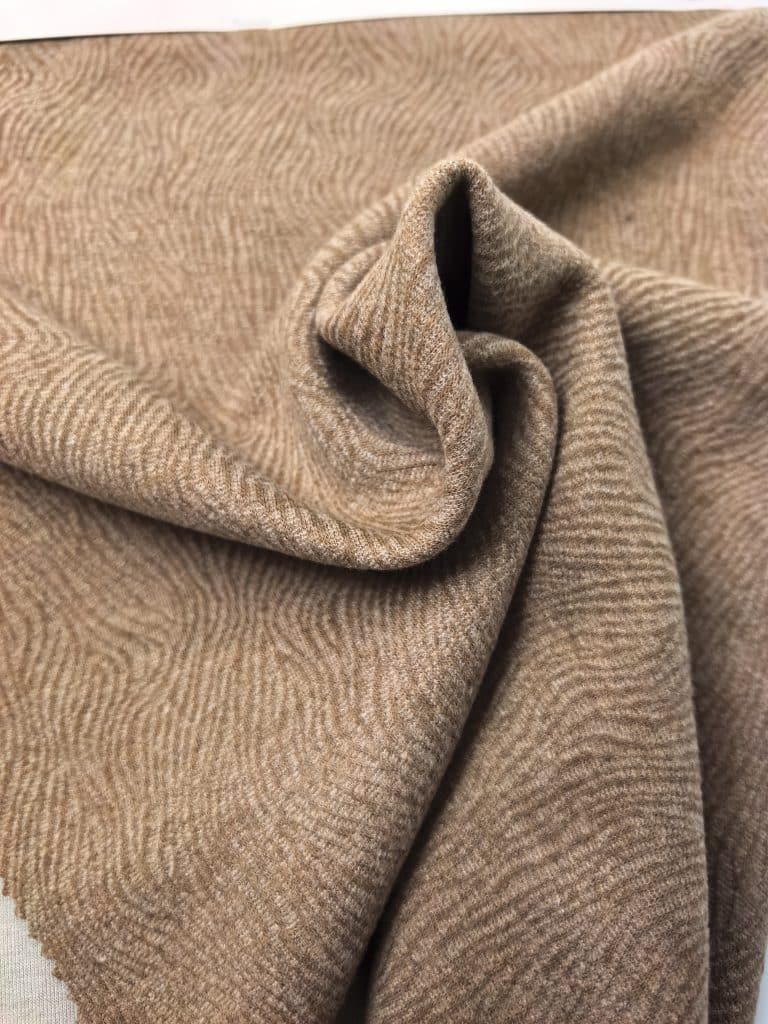
Fabric consumption calculation is where sourcing budgets quietly break. A buyer can pick the right style, the right weight and the right backing, then lose money on quantity: too little fabric stops the cutting room mid-run, too much leaves paid-for metres sitting in a warehouse. This article sets out the full calculation chain: pattern piece lengths, marker efficiency, the allowances on top, worked examples at 160 cm width, and how to convert a garment order into a roll order against a roughly 100 m MOQ. It is written from the mill side in Shaoxing Keqiao, where we have produced wool-feel bonded fabric since 2014 and quote roll quantities for European and Middle Eastern garment makers every week.
A note on all numbers in this article. Every consumption figure and marker efficiency percentage below is a widely used industry planning range. None of them is a Huajay guaranteed value, and none replaces your own calculation. Your pattern, your size mix, your marker plan and a tested sample of the actual style are the only reliable inputs. Where a number depends on the specific fabric style, we mark it 【verify per style】. All worked examples are explicitly illustrative.
Why Bonded Fabric Changes the Consumption Math
Bonded fabric behaves differently from a loose woven at the cutting table, and the differences show up in the quantity you order.
Weight is not the same as metres. Our styles run 460–520 GSM, against a typical 250–350 GSM for coating wovens. Metre consumption per coat may look similar on paper, but cost per metre, fabric weight per garment, and shipping weight are all higher. If you are moving from a traditional woven, see why that trade is happening in why bonded fabric is replacing traditional wool and how weight classes map to garment types in our GSM guide for winter outerwear.
Dimensional stability cuts both ways. The bonded construction, a face fabric laminated to a 140 GSM jersey or 220 GSM fleece backing, is stable in handling. Cutters generally need less easing and overfeed than with a loose wool woven, which helps consistency. But cut edges behave differently: there is no fringing to trim later, and equally no letting out if a piece is cut short. Errors are permanent, so allowances must be right the first time.
Nominal width is not usable width. Our nominal width is about 160 cm. Selvedge and the bonding edge trim reduce the cuttable width the marker can actually use, and the deduction varies by style 【verify per style】. Always run marker plans on cuttable (usable) width, confirmed on a received sample, not on the nominal figure in a quotation.
Condition before you measure. Measure width and shrinkage on conditioned samples per ISO 139 or ASTM D1776, typically 20°C and 65% relative humidity, not straight off the roll. A roll that travelled in a humid container can measure differently from the same fabric after conditioning, and your consumption numbers inherit that error. Cite the current version of whichever standard your lab works to.
The Fabric Consumption Calculation: Core Formula per Garment
Step 1: Pattern piece lengths
List every pattern piece for one garment: fronts, backs, sleeves, facings, collars, pocket bags if cut from self-fabric. For each piece, record the length it occupies in the marker direction, including hem and seam allowances. Sum them. This total is the theoretical fabric area the garment needs, expressed in running metres at full width.
Step 2: Marker efficiency
Marker efficiency is the percentage of marker length actually covered by pattern pieces. Nothing reaches 100%; the rest is interlocking waste. Whether the marker is made by hand or with CAD nesting software, the same factors drive the result:
- Size mix: multi-size markers nest better than single-size ones, because grading across sizes lets pieces interlock
- Piece shape: large rectangular panels such as coat fronts and trouser legs nest well; curved pieces such as collars and facings waste more
- Lay length and spread height: longer markers give the nesting more freedom; thicker lays raise the cost of a mistake
- Nap or direction: one-way textures force all pieces in one direction and cut efficiency
- Pattern repeat: patterned fabrics must align across pieces, adding repeat waste
Typical planning bands for outerwear at wide widths run from the low 70s up to the mid 80s percent 【confirm against your cutting room】.
Step 3: The formula
Consumption per garment (m) =
    Sum of pattern piece lengths (m)
  ÷ Marker efficiency (decimal)
Simplified planning version, when you have no marker yet:
Consumption per garment (m) ≈
    (garment length + sleeve length + trouser/skirt length as applicable)
  × width factor
The width factor depends on how many pieces fit across 160 cm. For coats and blazers it is commonly planned around 1.3–1.6 【verify with your pattern maker】.
Step 4: Allowances to add on top
- Shrinkage and relaxation: establish it properly with ISO 5077 or AATCC 135 on a conditioned sample rather than guessing a percentage
- End-of-roll loss: the last few metres of each roll are often unusable
- Cutting-room tolerance: splices, re-cuts, misaligned lays
- Spread and defect loss: faults flagged in inspection remove short sections
A combined fabric wastage allowance of roughly 3–8% is common industry planning practice. Heavy textures and pattern repeats push it higher.
Fabric Consumption per Coat, Blazer and Trouser: Planning Ranges
At about 160 cm nominal width, industry planning ranges put fabric consumption per coat at 2.8–4.2 m for a women’s long coat and 1.7–2.4 m for a tailored blazer, before order-level wastage. Trousers and skirts sit below that, at 1.1–1.6 m and 0.8–1.4 m per piece.
Table 1. Indicative consumption planning ranges at 160 cm nominal width — industry ranges to verify against your own pattern and marker plan.
| Garment | Consumption range per piece (m) | Typical marker efficiency band | Main driver of variation |
|---|---|---|---|
| Women’s long coat | 2.8 – 4.2 | 72 – 82% | Garment length, facing width, repeat |
| Tailored blazer | 1.7 – 2.4 | 75 – 85% | Collar and facing shapes, size mix |
| Women’s straight-leg trousers | 1.1 – 1.6 | 82 – 90% | Waistband layout, 2-up vs 1-up nesting |
| Skirt, straight or A-line | 0.8 – 1.4 | 78 – 88% | Panel count, flare |
Backed styles differ in hand and sewability, which affects how cutters handle the lay; compare the options in our jersey vs fleece backing guide. If you have not yet received physical swatches to measure usable width yourself, follow the process in how to request fabric samples from a China supplier.
Worked Examples at 160 cm Width
All three examples below are illustrative. The numbers are plausible planning figures, not measurements of any specific Huajay style.
Example 1: Women’s long coat
- Sum of pattern piece lengths, size M: 3.05 m
- Planned marker efficiency, mixed sizes with one-way texture: 78%
- Base consumption: 3.05 ÷ 0.78 = 3.91 m per coat
- Add 5% combined wastage for shrinkage per test, end-of-roll and cutting tolerance: 3.91 × 1.05 = 4.11 m per coat
Planning figure: about 4.1 m per coat. At 460–520 GSM and about 160 cm width, one coat takes roughly 5.1 m² of fabric, or 2.4–2.7 kg. Note the difference between running metres and square metres when costing freight: weight scales with area, not with the metre figure alone.
Example 2: Tailored blazer
- Sum of pattern piece lengths, size M: 1.62 m
- Planned marker efficiency: 81%
- Base consumption: 1.62 ÷ 0.81 = 2.00 m per blazer
- Add 5% wastage: 2.00 × 1.05 = 2.10 m per blazer
Planning figure: about 2.1 m per blazer. Blazer pieces suit this fabric well; see the jacket and blazer fabric application page for weight and surface guidance.
Example 3: Women’s straight-leg trousers
- Sum of pattern piece lengths, size M: 1.12 m
- Planned marker efficiency: 86%. Straight legs frequently achieve 2-up layouts at 160 cm usable width, so front and back pieces nest side by side
- Base consumption: 1.12 ÷ 0.86 = 1.30 m per pair
- Add 4% wastage: 1.30 × 1.04 = 1.35 m per pair
Planning figure: about 1.35 m per pair. Trouser-specific selection advice is in our women’s trouser fabric application guide and the article on choosing wool-feel bonded fabric for women’s trousers.
Why your numbers will differ
Expect your real figures to move for four reasons:
- Pattern engineering: a pattern maker who narrows facings or combines pieces can cut consumption by several percent
- Size-range mix: an XXL-heavy order consumes more per piece than an S–M-heavy one, even at identical marker efficiency
- Lay length limits: table length and spreader capacity cap how long a marker can be, which caps nesting gains
- One-way markers: nap, texture direction or shading forces all pieces one way, typically costing 3–8 efficiency points
This is why the industry ranges above are starting points, never order quantities.
Convert a Garment Order into a Fabric Order
Once consumption per garment is locked, the garment order converts to fabric like this:
Rolls to order =
    (pieces × consumption per piece × (1 + wastage %))
  ÷ metres per roll
Our MOQ is 1 roll, approximately 100 m per roll (confirm current MOQ and roll length at quotation). That changes the arithmetic from how many metres to how many rolls, and rounding becomes part of the commercial decision.
Mini worked example (illustrative): one 100 m roll of long-coat fabric at 4.11 m per coat including wastage yields 100 ÷ 4.11 ≈ 24 coats per roll. If your order is 600 coats: 600 × 4.11 = 2,466 m, which is 24.66 rolls. Order 25 rolls and accept a small surplus, or 26 rolls if the size mix skews large.
Size-mix distortion. Never scale the sample size across the whole order. Consumption for XL and XXL can run 8–15% above the size-M sample. Recalculate on the actual size ratio: multiply each size’s quantity by that size’s consumption, sum, then convert to rolls.
Rounding strategy when the math lands mid-roll. Three accepted options:
- Round up fully and treat the leftover metres as sampling stock
- Round up only if the remainder exceeds roughly half a roll’s yield; otherwise negotiate a part roll
- Reduce the order quantity to land on whole rolls, which works when the garment order is flexible
Table 2. Order-conversion worksheet with one fully worked illustrative column for 600 women’s long coats.
| Line | Field | Illustrative value |
|---|---|---|
| 1 | Pieces ordered | 600 |
| 2 | Consumption per piece, all allowances included (m) | 4.11 |
| 3 | Wastage % already included in line 2? | Yes |
| 4 | Total metres, line 1 × line 2 | 2,466 m |
| 5 | Metres per roll | about 100 m |
| 6 | Rolls to order, rounded up | 25 |
| 7 | Buffer, line 6 × 100 minus line 4 | 34 m ≈ 8 coats |
Want this arithmetic run against your actual tech pack? Send it to us with your size ratio and we will quote roll quantities for the matching bonded style.
Checklist A: pre-PO quantity checklist
- Pattern locked and graded for every size in the ratio
- Marker efficiency confirmed by your cutting room on an actual marker, not assumed
- Usable width confirmed on a received sample, not on the nominal quotation
- Shrinkage tested per ISO 5077 or AATCC 135 on a conditioned sample
- Pattern repeat waste counted for any patterned style
- Roll rounding strategy agreed internally and with the supplier
- Buffer percentage set based on order criticality and reorder lead time
- Incoming inspection planned so quantity and quality problems surface before cutting
Pair this with our bonded fabric inspection checklist and the factory quality control overview so the metres you ordered are the metres that reach the cutter.
Hidden Waste Drivers: Pattern Repeat, Direction and Texture
Three fabric characteristics raise consumption invisibly, after the marker plan already looks efficient.
Pattern repeat. A herringbone or jacquard must align across seams, so pieces are placed at repeat intervals rather than freely nested. Larger repeats waste more: a big repeat can add 5–10% consumption versus a plain surface. Repeat sizes differ by style 【verify repeat size per style】, and the plainest option, a melange twill, carries no repeat penalty at all.
One-way direction. Nap, brushed texture or directional shading forces a one-way marker: every piece points the same way, and the interlocking freedom that drives efficiency disappears. Directional shading also means pieces must come from the same roll section to shade-match, which fragments the lay.
Textured surfaces. Bouclé and looped textures can shift or pull during spreading, raising spread loss and demanding slower, more careful cutting. Plan extra cutting-room tolerance for these styles.
How to ask a supplier up front. Before requesting a quotation, send three questions: what is the pattern repeat size in cm, warp and weft; is the style one-way for nap, texture or shading direction; and are there special spreading or cutting notes for this surface. A supplier who answers these precisely will also answer your width and shrinkage questions precisely.
Timing the Order for Autumn/Winter Production
Quantity math is useless if the fabric arrives after the cutting window. The practical sequence:
- Sample approval: receive swatches, condition them, measure usable width, run shrinkage tests. Use our sample request process to start this early
- Consumption lock: pattern graded, marker run, consumption per size confirmed
- Roll calculation: apply Table 2, agree rounding and buffer
- PO issued: with style, shade, roll quantity and delivery terms explicit
- Production: our lead time is 7–15 days (confirm current lead time at quotation)
- Shipping buffer: sea freight plus customs plus incoming inspection before cutting starts
Stock shades versus repeat-dyed lots. Stock shades ship inside the standard lead time. A repeat-dyed lot needs earlier commitment, because dyeing, testing and lot approval are added before production, and it carries shade-continuity risk if the order later needs a top-up from a different lot. If shade continuity matters, lock the full order into one lot and check shades on arrival using the shade section of our inspection checklist.
Buffer practice. Set a buffer percentage on first bulk orders and reduce it once consumption is proven 【agree with your supplier】. Leftover roll metres are not waste: they become next season’s sampling stock, size-run top-ups and prototype fabric. That is one real advantage of ordering in whole rolls rather than exact metres.
Six Calculation Mistakes Buyers Make
Checklist B: the mistakes list
- Applying sample-size consumption to the whole size mix. The size-M sample underestimates L–XXL consumption. Recalculate on the real ratio
- Using nominal instead of usable width. At about 160 cm nominal, selvedge and edge trim reduce what the marker can use. Confirm usable width on a sample
- Forgetting pattern repeat. Repeat waste is invisible until the first marker is run. Get repeat sizes in writing before quoting
- Assuming near-100% marker efficiency. Even excellent nesting lands in the 80s for outerwear. Planning at 95% will strand your cutting room short
- Skipping the shrinkage test. A guessed shrinkage percentage compounds across every garment in the order. Test per ISO 5077 or AATCC 135 on a conditioned sample
- Ordering by the metre when MOQ is by the roll. If the MOQ is one roll of about 100 m, build the roll logic into the conversion from the start, including rounding and buffer
FAQ
What is the fabric consumption per coat?
A women’s long coat consumes roughly 2.8–4.2 m and a tailored blazer 1.7–2.4 m at about 160 cm width, before order-level wastage. These are industry planning ranges; your locked pattern, confirmed marker efficiency and tested shrinkage give the real number for your style.
How many meters of fabric for a blazer with pattern repeat?
Add the repeat penalty on top of the base consumption. A blazer in a large-repeat jacquard or herringbone can consume 5–10% more than the same pattern in a plain melange twill, because pieces must be placed at repeat intervals rather than freely nested.
Does 160 cm width improve yield over 150 cm?
Generally yes. Extra width lets more pieces sit side by side, and trousers often move to 2-up layouts, which pushes marker efficiency up several points. The gain depends on your piece widths, so re-run the marker rather than assuming a fixed improvement.
How much extra should I order on a first bulk?
Common practice is a combined wastage allowance in the mid-single-digit percent, plus whole-roll rounding that leaves a small surplus. Set it higher for textured or repeating styles. Prove the number on a pilot order, then tighten it 【agree with your supplier】.
Does backing choice change consumption?
Not the metre math directly: 140 GSM jersey and 220 GSM fleece styles share the same nominal width and similar usable width. Backing does change handling, drape and cutting behaviour, which affects efficiency marginally and freight weight meaningfully.
Can Huajay quote roll quantity from my tech pack?
Yes. Send the tech pack or pattern with your size ratio and we will quote rolls against consumption, usable width, MOQ and current lead time. See the FAQ for more, or go straight to contact.
Conclusion
A reliable fabric consumption calculation follows one short chain: pattern piece lengths, divided by confirmed marker efficiency, plus tested shrinkage and cutting-room allowances, converted to rolls of about 100 m each, rounded with a deliberate buffer. Every step replaces a guess with a measurement, and the measurements all come from a conditioned sample and a real marker plan.
To turn this into numbers for your own order, send your tech pack or pattern to contact and we will return a roll-quantity quotation for the matching bonded style. If you are still comparing styles, request a sample first and verify usable width and shrinkage on your own table before locking any quantity.